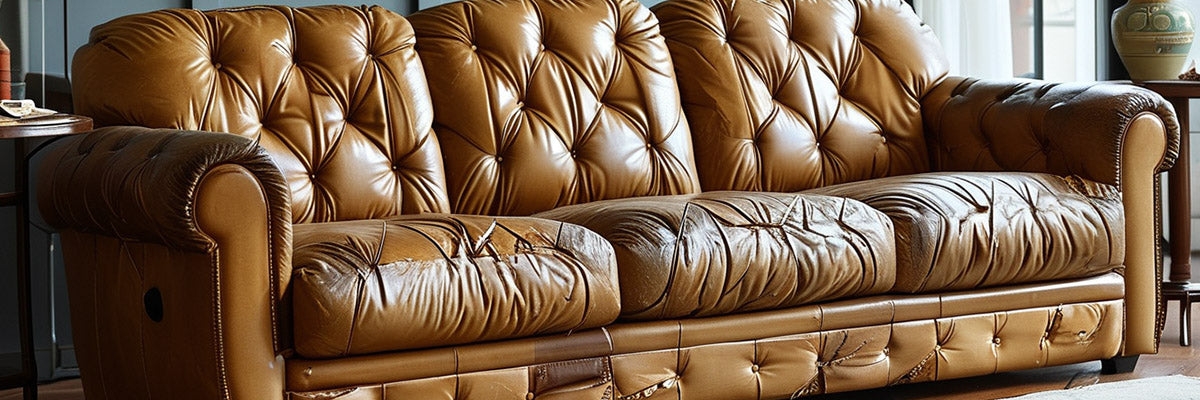
Leather couches are elegant, durable, and can last for years with proper care. However, even the highest quality leather furniture can develop issues over time, especially with frequent use. One of the most common problems is loose or unraveling stitching. Whether it's due to wear and tear, stress on the seams, or simply age, loose stitching can lead to further damage if left untreated. Fortunately, repairing loose stitching on a leather couch is a manageable task that you can do at home with the right tools and techniques. In this guide, we'll walk you through the steps to effectively repair loose stitching on your leather couch and restore its appearance and strength.
Table of Content
Step 1: Assess the Damage
Before diving into the repair process, take a close look at the loose stitching. If the stitching is simply loose but intact, you can re-sew it without much difficulty. If the stitching has completely unraveled or the fabric beneath is damaged, you may need to reinforce the area with additional patches or stitches.
- Small Areas:
For a few loose stitches or a minor section of the seam, you can simply re-sew the area.
- Large Areas:
If the stitching is completely unraveled, you may need to re-sew a larger section of the seam or even replace a section of leather or fabric under the stitching.
Step 2: Gather the Necessary Tools and Materials
To repair loose stitching on a leather couch, you'll need a few essential tools and supplies. Some of these may already be in your sewing kit, but others may need to be purchased specifically for this project.
Materials:
- Leather Thread: Leather thread is specially designed to be durable and able to withstand the tension of seating and daily use. It comes in various colors, so choose one that matches the color of your couch.
- Leather Needle: A leather needle has a triangular point that can easily pierce through the tough leather material without causing damage.
- Fabric Glue (Optional): If the stitching is starting to come loose but not completely unraveled, you can use fabric glue to temporarily hold the stitching in place before re-sewing.
- Seam Ripper (Optional): If the stitching is too damaged and you need to remove it entirely, a seam ripper is helpful to carefully cut and remove the old stitching.
Tools:
- Thimble (Optional): A thimble can help protect your fingers while you push the needle through the leather.
- Scissors or Snips: You'll need sharp scissors or snips to trim any loose threads before you start sewing.
- Awl (Optional): An awl can be used to poke small holes to guide the needle, especially in more stubborn areas.

Step 3: Clean the Area
Before repairing the stitching, make sure the area around the loose stitching is clean. Dirt, oils, and grime can interfere with your stitching, making the repair less durable.
1. Clean the Leather:
Use a mild leather cleaner and a soft cloth to gently clean the area around the stitching. Avoid using harsh chemicals, as they can damage the leather.
2. Dry the Leather:
Allow the leather to dry completely before proceeding with the repair to ensure that your stitching adheres properly.
Step 4: Remove Any Old or Damaged Stitching (If Necessary)
If the stitching is completely unraveled or damaged, you’ll need to remove the old stitching before you can start your repair.
1. Use a Seam Ripper:
Carefully use a seam ripper to cut through the old stitching. Be gentle, as you don’t want to damage the leather while removing the stitching.
2. Remove Threads:
Once the stitching is cut, pull out the loose threads. Use a pair of small scissors to trim any remnants of old thread.
Step 5: Re-Sew the Loose Stitching
Now that the area is prepared, you can begin the process of re-sewing the loose stitching. This is a relatively simple process, but it may take some time, especially if you're working with a long seam.
1. Thread the Needle:
Cut a length of leather thread (about 18 inches to 24 inches). Thread the needle, leaving a small amount of extra thread on both ends.
2. Start at One End of the Seam:
Insert the needle into the leather from the back side of the couch. Make sure the stitching pattern matches the original stitching to maintain a consistent look.
3. Use a Backstitch or Saddle Stitch:
For added strength, use a backstitch or saddle stitch. The saddle stitch is a traditional method used in leatherworking that creates a durable, uniform seam. To do this:
- Push the needle through the leather from one side of the seam.
- Pass the needle through the same hole from the opposite side.
- Repeat this process along the entire length of the loose stitching, ensuring the stitches are even and taut.
4. Tie Off the Thread:
Once you’ve re-sewn the loose stitching, tie a secure knot at the end of the thread to prevent it from unraveling. You can use a small dab of fabric glue to secure the knot, especially if it’s in a less visible area.

Step 6: Reinforce the Stitching (Optional)
If you’re concerned that the stitching might loosen again, consider reinforcing the seam. This can be done by applying a thin layer of fabric glue or a leather adhesive along the edge of the stitching. Allow the glue to dry fully before using the couch.
1. Apply Glue:
Use a small brush to apply a thin, even layer of fabric or leather adhesive along the stitching line.
2. Let It Dry:
Allow the glue to dry completely to ensure that it holds the stitching in place.
Step 7: Condition the Leather
Once the stitching is repaired, it's important to condition the leather to keep it supple and prevent further damage.
1. Apply Leather Conditioner:
Use a high-quality leather conditioner to treat the entire couch. This will help maintain the leather’s softness and prevent cracking.
2. Buff the Surface:
Use a clean, soft cloth to buff the leather and give it a polished finish.
Step 8: Regular Maintenance
To prevent further stitching issues, regularly check the seams of your leather couch. Promptly address any signs of loose stitching or wear before the problem becomes larger.
- Clean and condition the leather regularly to maintain its integrity.
- Keep the couch out of direct sunlight and away from extreme temperatures, which can cause the leather to dry out and become more prone to damage.
Conclusion
Repairing loose stitching on a leather couch is a straightforward process that can significantly extend the life of your furniture. With the right tools and techniques, you can re-sew the stitching and restore the strength and appearance of your couch. Taking the time to address minor stitching issues promptly can save you from larger, more expensive repairs down the road. By maintaining your leather couch and performing regular repairs as needed, you can keep it looking beautiful and functional for years to come.
If you want to buy our home furniture or couch for living room, you can check out more on our store

