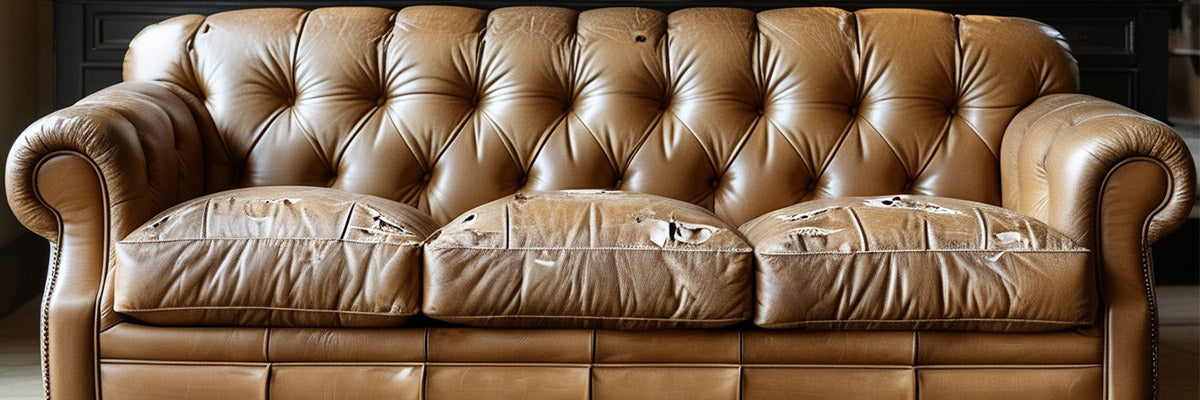
Leather couches are prized for their durability and timeless elegance, but they are not immune to wear and tear. Over time, it’s common for leather to develop holes due to various factors, including accidental punctures, pet damage, or general wear. Fortunately, fixing a hole in your leather couch is a manageable task that can restore its appearance and prolong its life. In this article, we’ll guide you through the steps to repair a hole in your leather couch effectively.
Table of Content
1. Leather and Its Properties
Before diving into the repair process, it’s important to understand the nature of leather. Leather is a natural material, which means it can expand, contract, and develop imperfections over time. Different types of leather (such as full-grain, top-grain, and bonded leather) may require slightly different approaches, but the fundamental repair techniques remain the same.
2. Tools and Materials You’ll Need
To successfully repair a hole in your leather couch, gather the following tools and materials:
- Leather Repair Kit: These kits typically include patches, adhesive, and color matching compounds.
- Scissors: For cutting the patch or leather.
- Clean Cloth: To wipe the area before applying the repair.
- Leather Cleaner: To ensure the surface is free of dirt and oils.
- Leather Conditioner: To maintain the leather’s suppleness after the repair.
- Fine Sandpaper: To smooth edges if necessary.

3. Step-by-Step Repair Guide
Assess the Damage:
Start by evaluating the size and location of the hole. Smaller holes (up to 1 inch in diameter) can often be repaired more easily than larger ones. If the hole is accompanied by extensive damage to the leather, consider consulting a professional.
Clean the Area:
Use a leather cleaner and a clean cloth to remove any dirt or oils around the hole. This step is crucial for ensuring a good bond between the leather and the repair materials. Allow the area to dry completely before proceeding.
Prepare the Patch:
If you’re using a leather patch from a repair kit, cut it to size. The patch should be slightly larger than the hole to ensure complete coverage. If you have matching leather scraps, you can use those instead for a more seamless look.
Apply Adhesive:
Using the adhesive provided in your repair kit, apply a thin layer around the edges of the hole and on the patch itself. Be careful not to use too much adhesive, as this can create a messy appearance.
Position the Patch:
Carefully place the patch over the hole, ensuring that it is centered and fully covers the damaged area. Press down firmly and hold it in place for a few moments to ensure a good bond. If your patch comes with a backing, follow the instructions on whether to remove it before or after applying.
Smooth the Edges:
If the edges of the patch are raised, use fine sandpaper to gently smooth them into the surrounding leather. This step is particularly important for larger patches to help blend them into the couch.
Color Matching:
Many leather repair kits include color-matching compounds. Once the patch is securely in place, use these compounds to blend the patch with the surrounding leather. Apply with a small brush or cloth, feathering the color outwards from the patch to create a seamless transition.
Allow to Dry:
After applying the color, allow the repair to dry completely according to the instructions provided in your repair kit. This could take several hours or longer, depending on the materials used.
Condition the Leather:
Once the repair is dry, apply a leather conditioner to the entire area. This will help restore moisture and prevent the leather from becoming brittle. Conditioning also helps maintain the overall appearance of your couch.
Final Inspection:
After the conditioner has been absorbed, inspect your repair. Check for any areas that may need additional color matching or smoothing. If everything looks good, your leather couch should be back to its former glory!

4. Preventive Measures
To avoid future damage to your leather couch, consider the following preventive measures:
Use Coasters:
Protect the leather from spills and stains by using coasters under drinks.
Keep Pets Off:
If possible, train pets to stay off the couch to prevent scratches and punctures.
Regular Cleaning:
Clean your leather regularly to remove dirt and oils that can cause wear.
Condition Frequently:
Apply leather conditioner every few months to keep the material supple and reduce the risk of cracking.
5. Conclusion
Fixing a hole in your leather couch may seem daunting, but with the right tools and a bit of patience, you can restore its appearance and functionality. By following the steps outlined above, you’ll be able to repair small holes effectively, saving money on professional repairs and extending the life of your beloved sofa. Remember to take preventive measures to protect your leather couch from future damage, ensuring it remains a comfortable and stylish centerpiece in your home for years to come.
If you want to buy our home furniture or couch for living room, you can check out more on our store

