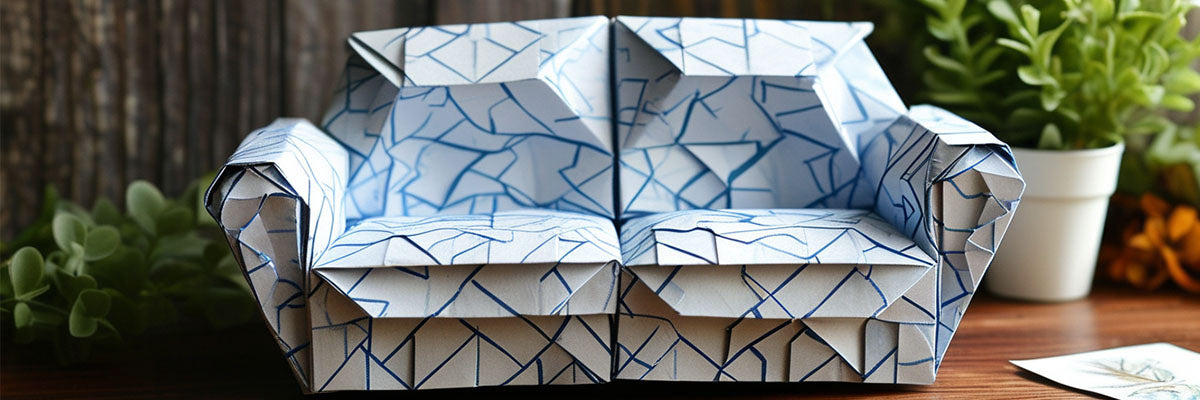
Origami, the Japanese art of paper folding, offers endless creative possibilities. One delightful project is making an origami sofa. This charming paper creation can serve as a decorative piece, a unique gift, or even a fun addition to a miniature setting. In this guide, we'll walk through the steps to create your very own origami sofa.
Table of Content
Materials Needed
Before diving in, gather the following materials:
1. Paper:
Choose a square piece of paper. Origami paper is ideal, but any paper will work as long as it can hold a crease. Colored or patterned paper can add an attractive touch.
2. Scissors:
If you need to trim your paper to a perfect square.
3. Bone Folder:
Optional but helpful for making crisp folds.
4. Ruler:
For measuring (optional).
Step 1: Start with a Square
Begin with a square piece of paper. If you’re starting with a rectangular sheet, you’ll need to cut it down to a square. A standard size of 6 inches (15 cm) is a good starting point, but feel free to experiment with larger or smaller sizes depending on your preference.
Step 2: Create the Base Folds
1. Fold the Paper in Half:
Take your square paper and fold it in half diagonally to form a triangle. Crease well and then unfold.
2. Fold the Other Diagonal:
Now, fold the paper in half diagonally the other way. Crease and unfold again. You should see an "X" crease pattern on your paper.
3. Fold in Half Vertically:
Fold the paper in half horizontally, aligning the top and bottom edges. Crease well and unfold. You will now have a "+" crease pattern on your paper.
4. Fold in Half Again:
Fold the paper in half vertically. This will create additional creases that will help with the next steps.

Step 3: Form the Sofa's Backrest
1. Create the Backrest Folds:
With the paper still flat, take the top corner of the paper and fold it down to meet the center crease line. This will create the backrest of your sofa.
2. Reinforce the Crease:
Press down on the fold to ensure it’s crisp. This fold should form a triangle at the top of your square.
Step 4: Shape the Sofa Arms
1. Fold the Sides:
Take the left and right edges of the paper and fold them towards the center. You want these folds to start about one-third down from the top of the backrest fold. These will create the arms of the sofa.
2. Adjust the Width:
If you’d like wider arms, adjust the folds accordingly. The beauty of origami is in personal preference, so feel free to modify dimensions.

Step 5: Create the Sofa Seat
1. Fold the Bottom Up:
Take the bottom edge of the paper and fold it upwards towards the backrest, about one-third of the way up. This will create the seat of the sofa.
2. Crisp the Edges:
Make sure all your folds are crisp. You can use a bone folder or simply run your fingernail along the crease.
Step 6: Final Adjustments
1. Shape the Sofa:
To give your origami sofa a more defined shape, gently fold the corners of the arms downwards. This will create a more inviting appearance.
2. Create a Base (Optional):
If you want your sofa to have a more stable base, you can fold the bottom edges outward slightly. This helps prevent it from tipping over.
Step 7: Personalize Your Sofa
Now that your origami sofa is complete, it’s time to personalize it:
- Add Details:
Use markers or colored pencils to add patterns, textures, or even little pillows.
- Use Different Papers:
Experiment with various types of paper to create different styles. For instance, patterned origami paper can add a touch of flair.
- Miniature Decor:
Create tiny origami cushions or side tables to complement your sofa.
Conclusion
Creating an origami sofa is a fun and satisfying project that introduces you to the world of paper art. Whether you're looking to decorate your space, make a gift, or simply explore your creative side, this simple yet charming piece is a great way to start. With practice, you can even create a whole living room scene, complete with origami chairs and tables. So grab your paper, follow these steps, and enjoy the delightful process of making your very own origami sofa!
If you want to buy our home furniture or couch for living room, you can check out more on our store

